
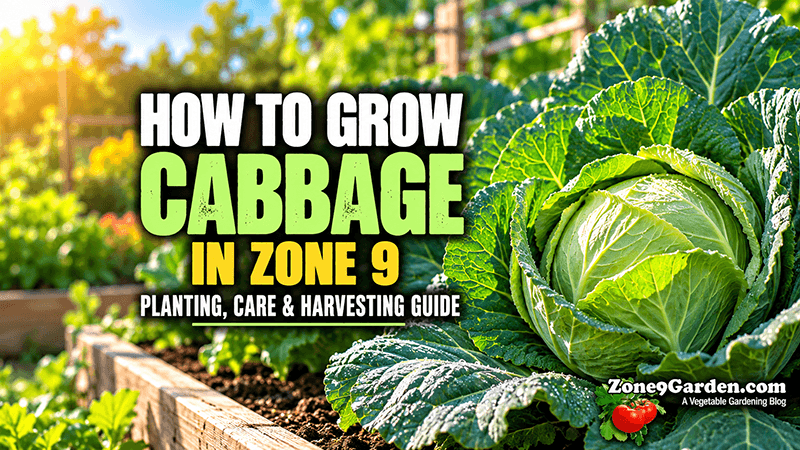
Cabbage is one of the most rewarding cool-season vegetables you can grow in Zone 9. While much of the country prepares to shut down its gardens for winter, Zone 9 gardeners can take advantage of cooler temperatures to grow healthy, tightly packed heads of green, red, and savoy cabbage.
The secret to growing cabbage successfully in Zone 9 is timing. Cabbage thrives in cool weather, but the long, hot summers common throughout Zone 9 can make growing it challenging during the wrong season. Plant too early, and excessive heat may interfere with head development. Plant too late in spring, and rising temperatures can reduce the quality of your harvest.
Fortunately, with proper planning, cabbage can become a dependable addition to your fall, winter, and early-spring vegetable garden.
Whether you’re gardening in Florida, Texas, Arizona, Louisiana, or California, this guide will walk you through growing cabbage from seed to harvest, including choosing varieties, preparing soil, transplanting, watering, fertilizing, preventing pests, and knowing when your cabbage is ready to pick.
For detailed crop specifications, including planting depths, spacing, temperature requirements, and common diseases, visit our Zone 9 Cabbage Crop Profile.
Why Cabbage Grows Well in Zone 9
Cabbage (Brassica oleracea var. capitata) belongs to the Brassicaceae family, which also includes broccoli, cauliflower, kale, collard greens, and Brussels sprouts.
These vegetables are often called cole crops because they share similar growing requirements and generally prefer cooler temperatures.
Cabbage grows best when average temperatures are approximately 60–65°F. These conditions encourage steady leaf development and the formation of firm, dense heads.
In Zone 9, these temperatures typically occur during fall, winter, and portions of early spring.
Growing cabbage during the cooler months offers several advantages:
- Reduced heat stress compared with summer growing conditions.
- Better conditions for developing firm, compact heads.
- Lower evaporation rates and often more manageable watering requirements.
- An opportunity to keep vegetable beds productive throughout winter.
- The ability to grow cabbage alongside other cool-season vegetables.
Although cabbage tolerates light frost, it can struggle when temperatures climb above approximately 80°F, particularly during head development.
This is why cabbage is an excellent addition to your Zone 9 Fall Planting Guide and winter vegetable garden.
When to Plant Cabbage in Zone 9
Timing is arguably the most important factor in growing cabbage successfully.
Unlike tomatoes, peppers, and other warm-season vegetables, cabbage should be planted so most of its growth occurs during cooler weather.
Zone 9 includes two USDA hardiness subzones, 9a and 9b, and stretches across several different climates. Planting dates that work in humid Florida may need adjustment for inland Arizona or coastal California.
The following planting windows provide a general starting point. Exact timing should be adjusted to local conditions.
| Growing Stage | Fall Crop | Spring Crop |
|---|---|---|
| Start seeds indoors | July 15 – August 31 | December 15 – January 31 |
| Direct sow outdoors | August 15 – October 15 | January 1 – February 15 |
| Transplant outdoors | September 1 – November 15 | January 15 – March 1 |
| Expected harvest | November 1 – February 28 | March 15 – May 31 |
These are broad planning windows, not fixed dates for every Zone 9 location. In particularly hot areas, wait until temperatures moderate before setting transplants outdoors. In colder Zone 9a locations, protect young plants during hard freezes.
Fall Planting: The Best Season for Cabbage
For many Zone 9 gardeners, fall is the most dependable cabbage-growing season.
Starting seeds indoors during late summer allows young plants to develop while outdoor temperatures remain too hot for comfortable growth.
Once temperatures begin cooling, healthy transplants can be moved into prepared garden beds.
This approach gives cabbage several months of favorable growing conditions before spring temperatures return.
Spring Planting: A Shorter Growing Window
Spring cabbage is also possible, but timing becomes more important.
As winter transitions into spring, temperatures can rise quickly throughout Zone 9.
Choose varieties with relatively short maturity periods and start seeds early enough that heads can develop before prolonged warm weather arrives.
In warmer locations, winter planting may be more dependable than waiting until traditional spring planting dates.
Best Cabbage Varieties for Zone 9
Not every cabbage variety performs equally well in warm-climate gardens.
When choosing cabbage, consider its days to maturity, heat tolerance, head size, and intended use.
Early-maturing varieties are particularly useful when your cool-weather growing window is limited.
Green Cabbage
Green cabbage is the familiar round-headed variety commonly used in coleslaw, soups, stir-fries, and fermented dishes.
Bravo: A green hybrid cabbage included in UF/IFAS recommendations for Florida production.
Bronco: Produces uniform green heads and is used in warm-region commercial production.
Cheers: A hybrid green cabbage recommended for Florida growing conditions.
Early Jersey Wakefield: An early-maturing, pointed-head cabbage that can be particularly useful when spring temperatures rise quickly.
Red Cabbage
Red cabbage adds deep purple-red color to vegetable gardens and is excellent for fresh salads, slaws, and pickling.
Red Dynasty: A red cabbage variety included in UF/IFAS and Texas A&M recommendations.
Red Jewel: A red hybrid cabbage recommended for Florida production.
Savoy Cabbage
Savoy cabbage produces crinkled, textured leaves and is often appreciated for its tender texture.
Savoy King: A savoy cabbage variety included in regional Extension recommendations.
Savoy Ace: Another savoy variety included in Texas A&M recommendations.
For first-time cabbage growers, consider planting one early green variety and one red or savoy variety to compare performance in your garden.
How to Start Cabbage From Seed
Starting cabbage indoors gives Zone 9 gardeners greater control over germination and early plant development.
This is especially valuable during late summer when outdoor soil temperatures may still be excessively warm.
Step 1: Prepare Seed-Starting Containers
Fill seed trays or small containers with a lightweight, well-draining seed-starting mix.
Avoid using compacted garden soil because it may drain poorly and can introduce disease organisms into your seedlings.
Containers should have drainage holes to prevent water from accumulating around developing roots.
Step 2: Plant the Seeds
Plant cabbage seeds approximately ¼ to ½ inch deep.
Cover them lightly with seed-starting mix and gently moisten the surface.
Under favorable conditions, cabbage seeds typically germinate within 4–10 days.
Although cabbage can germinate across a fairly wide temperature range, temperatures around 70–77°F are an excellent target for rapid germination.
Step 3: Provide Adequate Light
Once seedlings emerge, provide bright light immediately.
A sunny window may not provide enough light, particularly when seedlings are started indoors during winter.
A grow light positioned appropriately above the seedlings can encourage compact, sturdy growth.
Seedlings receiving insufficient light often develop long, weak stems and may struggle after transplanting.
Step 4: Maintain Consistent Moisture
Keep the growing medium evenly moist but never saturated.
Allow excess water to drain freely.
Avoid letting seed trays dry out completely, especially during germination.
Step 5: Harden Off Seedlings
Before moving cabbage seedlings outdoors, gradually introduce them to outdoor conditions over approximately 7–10 days.
Begin with a short period in a sheltered location and slowly increase their exposure to sunlight and wind.
Hardening off reduces transplant shock and helps seedlings adjust to their permanent growing environment.
During hot early-fall weather, avoid placing young seedlings directly into intense afternoon sunlight.
How to Transplant Cabbage Into Your Garden
Once seedlings have developed several true leaves and are sturdy enough to handle, they can be transplanted into prepared garden beds.
Choose healthy plants with compact growth and strong roots.
Avoid using severely root-bound, yellowing, or stressed seedlings.
Step 1: Choose the Right Location
Cabbage performs best with at least 6–8 hours of direct sunlight daily.
During the cooler months, full sun generally produces the strongest growth.
In areas where early-fall temperatures remain high, temporary afternoon shade may help newly transplanted seedlings establish.
However, cabbage should not remain in heavy shade throughout its growing season.
Step 2: Prepare the Soil
Cabbage grows best in fertile, well-drained soil rich in organic matter.
A soil pH of approximately 6.0–6.5 is a useful target, although cabbage can grow in a somewhat broader range.
Before planting, remove weeds, loosen compacted soil, and incorporate finished compost where needed.
If your garden has sandy soil, organic matter can improve moisture and nutrient retention.
In heavier soils, proper drainage is especially important because cabbage roots can suffer when the soil remains waterlogged.
A soil test is the best way to determine whether additional nutrients or pH adjustments are necessary.
Step 3: Space Plants Correctly
Cabbage plants need adequate room for their outer leaves to expand and their heads to develop.
Use the following spacing as a general guideline:
| Planting Requirement | Recommended Spacing |
|---|---|
| Between plants | 12–18 inches |
| Between traditional rows | 24–36 inches |
| Seed planting depth | ¼–½ inch |
Closer spacing generally produces smaller heads, while wider spacing allows plants more room to develop larger heads.
In raised beds, follow the mature size recommendations for your chosen variety rather than relying strictly on traditional row spacing.
Step 4: Plant and Water
Dig a hole large enough to accommodate the root ball.
Set the seedling at approximately the same depth it was growing in its container, firm the soil gently around the roots, and water thoroughly.
Apply mulch around the plants to help conserve moisture and reduce weed competition.
Keep mulch away from direct contact with the stems.
How to Water Cabbage in Zone 9
Consistent watering is essential for producing healthy cabbage heads.
Cabbage develops broad leaves and a relatively shallow, spreading root system. When soil moisture fluctuates significantly, plants may experience stress that interferes with normal growth.
Inconsistent watering can also contribute to head splitting, particularly when dry soil is followed by heavy rainfall or excessive irrigation.
How Much Water Does Cabbage Need?
As a general starting point, established cabbage plants may need approximately 1–1½ inches of water per week from rainfall and irrigation combined.
Actual requirements depend on temperature, soil type, plant size, and weather conditions.
Sandy soils common in parts of Florida may require more frequent irrigation than moisture-retentive soils.
Follow these watering practices:
- Water deeply enough to moisten the root zone.
- Check soil moisture before watering rather than following a rigid daily schedule.
- Keep moisture consistent as cabbage heads begin forming.
- Water near the base of plants when possible.
- Reduce irrigation during extended rainy periods.
- Avoid allowing water to accumulate around the roots.
Drip irrigation or soaker hoses can be particularly effective because they deliver moisture directly to the soil while limiting unnecessary leaf wetness.
Why Cabbage Heads Split
Head splitting occurs when the inner leaves expand faster than the outer leaves can accommodate.
This often happens when mature cabbage receives a sudden increase in water after a dry period.
Rapid growth can cause the head to crack open.
To reduce splitting, maintain consistent soil moisture, avoid excessive late fertilization, and harvest heads promptly when they become firm.
How to Fertilize Cabbage
Cabbage is a moderate-to-heavy feeder that requires adequate nutrients to produce strong leaves and dense heads.
Nitrogen is especially important during early vegetative growth, but excessive fertilization can cause problems.
The best approach is to prepare the soil before planting and provide supplemental nutrients only when necessary.
Before Planting
Incorporate finished compost into the garden bed and use soil-test results to determine whether additional fertilizer is needed.
Avoid applying large amounts of fertilizer without knowing what nutrients are already present.
After Transplanting
Newly transplanted cabbage may benefit from starter fertilizer if soil fertility is low.
Apply products according to label directions, keeping concentrated fertilizer away from stems and roots.
During Early Growth
Once plants develop several sets of true leaves, a light nitrogen side-dressing may encourage healthy leaf development where additional nitrogen is needed.
During Head Formation
Continue monitoring plant growth and leaf color.
Additional feeding may be useful in sandy soils or following periods of heavy rainfall that leach nutrients.
However, avoid heavy nitrogen applications as heads approach maturity.
For a better understanding of fertilizer selection, read our NPK Fertilizer Explained: Nitrogen, Phosphorus, and Potassium guide.
Common Cabbage Pests in Zone 9
One of the biggest challenges when growing cabbage is managing insects.
Even during the cooler months, Zone 9’s relatively mild weather allows several pests to remain active.
Regular inspection is one of the most effective ways to prevent small infestations from becoming serious problems.
Imported Cabbageworms
Imported cabbageworms are green caterpillars that feed on cabbage leaves.
They create irregular holes and may eventually damage developing heads.
Check the undersides of leaves for eggs and caterpillars. Remove caterpillars by hand when practical.
For significant infestations, a product containing Bacillus thuringiensis var. kurstaki (Bt) may help control susceptible young caterpillars when applied according to the label.
Cabbage Loopers
Cabbage loopers are green caterpillars that move by arching their bodies into a looping shape.
They feed on leaves and can leave noticeable holes throughout the plant.
Early detection is important because larger caterpillars can consume substantial amounts of foliage.
Diamondback Moths
Diamondback moth larvae are small green caterpillars that often feed on the undersides of cabbage leaves.
Their feeding can create translucent patches that eventually develop into holes.
Because diamondback moths can develop resistance to insecticides, avoid relying repeatedly on the same treatment.
Cabbage Aphids
Cabbage aphids are small gray-green insects that often gather in dense colonies.
They feed on plant sap and may cause distorted leaves, yellowing, or reduced growth.
A strong stream of water can dislodge some aphids, while insecticidal soaps labeled for edible brassicas may be useful when applied carefully.
Inspect developing heads because aphids can become difficult to remove once they settle between tightly packed leaves.
Flea Beetles
Flea beetles are small jumping beetles that create numerous tiny holes in leaves.
They are particularly damaging to seedlings and young transplants.
Fine insect-exclusion netting or floating row covers installed immediately after planting can help prevent damage, provided pests are not already trapped underneath.
Preventing Pest Problems
Healthy cabbage plants are generally better equipped to tolerate minor insect feeding.
Useful preventive practices include inspecting plants several times each week, removing heavily infested plant debris, controlling weeds that harbor pests, and rotating cabbage-family crops.
Insect netting can be especially valuable when plants are young.
Common Cabbage Diseases and How to Prevent Them
Cabbage can also experience several diseases, particularly during periods of prolonged humidity or excessive moisture.
Black Rot
Black rot is a bacterial disease that may cause yellow, V-shaped lesions along leaf margins.
As the disease progresses, leaf veins may darken.
Use disease-free seed or healthy transplants, avoid unnecessary overhead irrigation, and remove infected crop debris.
Clubroot
Clubroot affects cabbage roots, causing abnormal swelling and restricting the plant’s ability to absorb water and nutrients.
Aboveground symptoms include stunted growth, yellowing, and wilting.
The disease is more common in acidic, poorly drained soils.
Where clubroot is confirmed, seek local Extension guidance on soil pH management and crop rotation. Raising soil pH may help suppress clubroot, but unnecessary liming can create other nutrient problems.
Downy Mildew
Downy mildew often develops during cool, humid conditions.
Symptoms may include pale yellow leaf spots and grayish growth on leaf undersides.
Improve airflow, avoid prolonged leaf wetness, and remove heavily infected plant material.
Alternaria Leaf Spot
Alternaria produces dark spots that may develop concentric rings.
The disease can spread through infected plant debris and contaminated seed.
Good sanitation, adequate spacing, and limiting leaf wetness help reduce disease pressure.
Fusarium Yellows
Fusarium yellows can cause yellowing, wilting, and uneven plant development.
The disease is associated with infected soil and may become more noticeable as temperatures increase.
Resistant varieties and crop rotation can help reduce problems where the disease is present.
Growing Cabbage in Raised Beds and Containers
Cabbage grows particularly well in raised beds when provided with adequate space, fertile soil, and consistent moisture.
Raised beds offer several advantages, including improved drainage and easier access for inspecting plants.
However, raised beds can also dry out faster than in-ground gardens, especially during warm weather.
For raised-bed cabbage:
- Use well-draining soil enriched with finished compost.
- Allow approximately 12–18 inches between plants, depending on the variety.
- Maintain consistent moisture.
- Mulch to reduce evaporation.
- Avoid overcrowding plants.
Cabbage can also grow in containers.
Choose a container with drainage holes and sufficient volume for the mature plant. A container holding approximately 5 gallons of quality potting mix is a practical starting point for one compact cabbage plant, although larger varieties may benefit from more space.
Container-grown cabbage may require more frequent watering and closer nutrient monitoring than cabbage grown directly in garden soil.
How Long Does Cabbage Take to Grow?
Many cabbage varieties mature approximately 70 days after transplanting, although actual maturity depends on the variety and growing conditions.
Early varieties may mature more quickly, while large-headed or long-season varieties may require considerably more time.
Always check whether the seed packet lists days to maturity from sowing or from transplanting.
Temperature also affects development.
Cool winter weather can slow growth, while prolonged heat may reduce head quality.
For this reason, the number of days printed on a seed packet should be treated as an estimate rather than an exact harvest date.
How to Know When Cabbage Is Ready to Harvest
Cabbage is ready to harvest when its head reaches the expected size for the variety and feels firm when gently squeezed.
A mature head should feel dense and solid rather than loose or spongy.
Do not assume that a larger head is always better.
Some compact cabbage varieties naturally produce smaller heads, while others can grow substantially larger.
Step-by-Step Cabbage Harvesting
- Examine the head and confirm that it feels firm.
- Use a clean, sharp knife to cut the stem below the head.
- Leave several outer wrapper leaves attached to protect the harvested cabbage.
- Remove damaged or diseased outer leaves as needed.
- Move harvested cabbage out of direct sunlight promptly.
Harvest mature heads before they begin splitting.
In some cases, a harvested cabbage plant may produce smaller secondary shoots if the lower stem and leaves remain in place, although these generally will not produce heads comparable to the original harvest.
How to Store Fresh Cabbage
Fresh cabbage stores best under cool, humid conditions.
After harvesting, remove loose or damaged outer leaves, but leave protective wrapper leaves intact when possible.
Do not wash cabbage before storage unless necessary. Excess surface moisture can encourage decay.
Place harvested heads in the refrigerator, preferably in the crisper drawer.
Whole cabbage heads can remain usable for several weeks under favorable refrigeration conditions, although storage life depends on variety, maturity, handling, and refrigerator conditions.
Cut cabbage should be wrapped or placed in a sealed container and used much sooner.
Common Mistakes When Growing Cabbage in Zone 9
Planting Too Early
Young cabbage plants exposed to excessive heat may become stressed and fail to establish properly.
Start seeds in a protected environment and transplant when outdoor conditions become more favorable.
Planting Too Late in Spring
Cabbage needs enough cool weather to develop a mature head.
Late spring planting can expose developing plants to temperatures that reduce head quality.
Inconsistent Watering
Allowing soil to become excessively dry and then applying large amounts of water can contribute to head splitting.
Maintain steady moisture throughout the growing season.
Overcrowding Plants
Crowded cabbage plants compete for sunlight, nutrients, and water.
Poor airflow can also increase disease pressure.
Follow recommended spacing for the variety.
Ignoring Caterpillars
Caterpillars can damage cabbage quickly, particularly when populations increase.
Inspect plants regularly rather than waiting until extensive leaf damage becomes visible.
Applying Too Much Nitrogen
Excessive nitrogen can encourage overly vigorous foliage and may interfere with balanced growth.
Use soil-test recommendations and avoid unnecessary late-season applications.
Frequently Asked Questions About Growing Cabbage in Zone 9
Can you grow cabbage year-round in Zone 9?
Cabbage can be grown during much of the cool season, but it is generally not a dependable summer crop in Zone 9. High temperatures can interfere with head development and reduce quality.
What is the best month to plant cabbage in Zone 9?
For many locations, October and November are excellent months for establishing fall cabbage transplants. However, the best planting month depends on local temperatures, frost risk, and whether you are growing in Zone 9a or 9b.
Does cabbage need full sun?
Cabbage grows best with approximately 6–8 hours of direct sunlight daily. Temporary afternoon shade can help young transplants during unusually hot early-fall weather.
Can cabbage survive a freeze?
Established cabbage plants tolerate light frost and may survive temperatures below freezing. Severe freezes can damage leaves and heads, particularly on young or stressed plants. Protection may be necessary during unusually cold weather.
Why is my cabbage growing leaves but not forming a head?
Possible causes include excessive heat, insufficient growing time, overcrowding, poor variety selection, nutrient imbalance, or other environmental stress.
Some plants simply need additional time to mature.
Why is my cabbage head splitting?
Head splitting commonly occurs when rapid growth follows a period of limited moisture. Overmature heads are also more likely to split. Consistent watering and timely harvesting help reduce the problem.
Can I grow cabbage in a five-gallon container?
Yes. Compact cabbage varieties can grow successfully in containers of approximately five gallons when provided with adequate drainage, quality potting mix, nutrients, and consistent watering.
Final Thoughts: Growing Cabbage Successfully in Zone 9
Growing cabbage in Zone 9 is largely about working with the seasons rather than against them.
By starting seeds at the right time, selecting suitable varieties, preparing fertile soil, and maintaining consistent moisture, you can produce healthy cabbage heads during the cooler months when many gardeners elsewhere have stopped growing vegetables.
Fall and winter provide particularly favorable opportunities, allowing cabbage to develop during periods of moderate temperatures.
Pay close attention to caterpillars, avoid overcrowding, and harvest heads promptly when they become firm.
With a little planning, cabbage can become one of the most dependable vegetables in your Zone 9 garden.
For more information about planning your cool-season vegetable garden, explore our Zone 9 Planting Calendar, Zone 9 Winter Planting Guide, and Zone 9 Cabbage Crop Profile.