Here in Zone 9, we are blessed with the ability to add to and turn a compost pile year-round. In other words, it’s not frozen solid and covered with ice and snow.
The winter months are ideal for getting that compost cooking before adding its nutrients to our soil ahead of tilling and planting.
I’ve had a compost pile for years and mostly I’m lackadaisical, dumping food scraps and leaves and hoping they’ll magically produce the finely grained organic matter that my garden craves. Everything does eventually break down, but it might take a year, and I know I can do better than that.
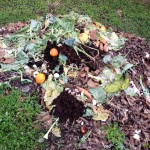
Yesterday I spied the messy pile and recognized non-productivity when I saw it. It was time to give my compost pile a much-needed makeover. While of course a compost pile can never be beautiful, you can make its form and function as attractive as possible.
This involves turning, spreading, layering, watering and using a powdered compost booster (Compost Maker). Being slightly obsessive about composting gets you to that place where beautiful compost is made.
![]()
My compost area is 6 feet wide and 3 feet deep, plenty of room for one pile of layered goodness and a blank spot to turn it over into every week or two.
My actual pile is (sometimes) is the optimal 3x3x3 feet, which allows for proper temperature to break down the components. Unfortunately, my compost items were taking up all that space, leaving no room for me to turn the pile, which I should be doing about every couple of weeks.
Here is how I rectified the situation:
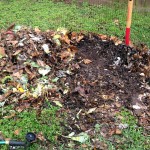
First, I took my manure fork (curved tines – better than a pitchfork) and scraped everything from the right to the left so I could get the finished compost out of the bottom.
Then, in the right-hand portion, I dumped a bunch of shredded paper, put some Compost Maker on it and watered it to the consistency of a damp sponge (no more or your pile could rot and bring the neighbors out to figure out what that smell is).
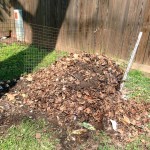
Now it was time to scrape everything from the left over to the right on top of the paper shreds, seeing some of it go flying, but paper’s biodegradable, right? I then dumped even more paper shreds, watered it in, sprinkled in some Compost Maker and covered with a big bag of leaves from the curb down the street. More Compost Maker and water.
Why did I do it this way? Because the Master Gardeners say to, and I’m through second-guessing them! They say to have layers of brown (leaves and I’m assuming paper shreds since they started out as trees), a layer of food scraps and a layer of green stuff. It should be about 80 percent brown and 20 percent green and food scraps, with judicious watering and turning.
By following these guidelines, I’m confident that I can turn basic components into food for the garden gods. If I can do it, you can too.
So go forth and compost.


