
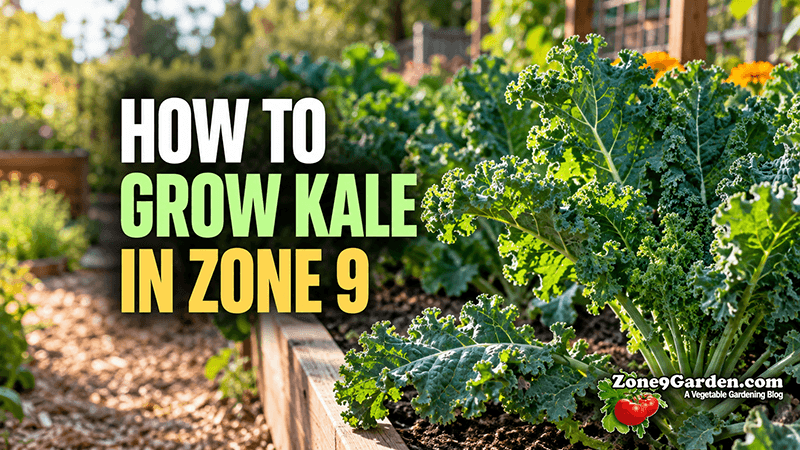
Kale is one of the most dependable cool-season vegetables for Zone 9. It tolerates cold better than many leafy greens, continues producing through light frost, and often develops better flavor as temperatures cool.
The biggest challenge in Zone 9 is not winter cold. It is timing the crop so that most of its growth happens before sustained warm weather arrives. Kale can survive warmer conditions, but leaf texture becomes tougher, bitterness can increase, and insect pressure often rises as temperatures move above the mid-70s.
This guide focuses on the practical side of how to grow kale in Zone 9, from planting and soil preparation through fertilizing, pest management, and harvest. For a quick-reference overview of varieties, spacing, diseases, weather limits, and crop relationships, see the Zone 9 Vegetable Garden Profile: Kale.
When to Plant Kale in Zone 9
Zone 9 gives gardeners two useful kale seasons: a long fall-to-winter season and a shorter spring season.
Kale grows best during mild weather. The crop data places the most favorable daytime temperatures around 60–75°F, with nighttime temperatures around 45–55°F. Soil temperatures around 65–70°F are excellent for germination, although kale can be established across a much broader range.
Fall Kale Planting
Fall is the most useful planting season for kale in much of Zone 9.
| Task | Fall Timing |
|---|---|
| Start seeds indoors | July 15 – August 31 |
| Direct sow outdoors | August 15 – November 15 |
| Transplant outdoors | September 1 – November 30 |
| Main harvest | October 1 – March 31 |
The earliest part of this window can still be very warm, especially in the southern parts of Zone 9. If daytime temperatures remain high, starting seeds indoors or in a protected location can help you get plants established before conditions improve outdoors.
Spring Kale Planting
Spring kale has a shorter production window because the crop is growing toward warmer weather.
| Task | Spring Timing |
|---|---|
| Start seeds indoors | December 15 – January 31 |
| Direct sow outdoors | January 15 – February 28 |
| Transplant outdoors | February 15 – March 31 |
| Main harvest | March 15 – May 31 |
The earlier you can establish spring kale, the more time the plants have to produce tender leaves before heat becomes an issue.
Choose the Right Kale Variety
Kale varieties differ in leaf shape, plant size, cold tolerance, and how long they remain productive.
Good options for Zone 9 include:
Blue Ridge — Hybrid kale recommended for Florida production.
Darkibor — Vigorous curly kale with dark blue-green leaves.
Oldenbor — Curly hybrid type suited to cool-season production.
Starbor — Compact curly kale that works well where space is limited.
Vates — Open-pollinated, compact, and cold tolerant.
Winterbor — Strong cold tolerance and useful for an extended cool-season harvest.
Dinosaur, or Lacinato kale — Produces long, dark, blistered leaves and performs well in cool conditions.
For fall and winter, most of these will perform well. For shoulder seasons, choosing vigorous and slow-to-decline cultivars can help extend your harvest.
Pick a Sunny Location
Kale performs best in full sun, with roughly 6–8 or more hours of direct sunlight per day.
It can tolerate some light partial shade, especially during warmer weather, but too much shade can slow growth and produce thinner plants.
During the coolest part of winter, give kale as much sunlight as possible.
During the warmer edges of the season, a location that receives morning sun and some late-afternoon shade can help reduce heat stress.
Prepare the Soil
Kale grows best in fertile, well-drained loam or sandy loam rich in organic matter.
A soil pH of about 6.0–6.5 is a good target.
Before planting, work finished compost or other organic matter into the bed.
This helps improve soil structure, moisture retention, and drainage. Kale does not perform well in compacted or waterlogged soil, so raised beds can be useful in locations that stay wet after heavy rain.
How to Plant Kale Seeds
Plant kale seed approximately ¼ to ½ inch deep.
Keep the seedbed evenly moist during germination.
Under favorable conditions, seedlings usually emerge in about 4–7 days. The best germination temperatures are around 65–70°F, although kale can germinate and establish in cooler soil.
A practical lower soil temperature is around 45°F.
Because fall soil can still be hot in Zone 9, shade cloth or indoor starting can help when planting early in the season.
How Far Apart to Space Kale
For full-size plants, space kale about 8–12 inches apart with approximately 18–24 inches between rows.
Closer spacing gives you more plants but smaller individual leaves and more competition.
Wider spacing allows plants to develop larger leaf rosettes and improves airflow, which can help reduce disease pressure.
If you are growing kale primarily for baby leaves, you can plant more densely and harvest sooner.
Direct Sow or Transplant?
Both methods work well.
Direct sowing is simple when outdoor temperatures are already favorable.
Transplants are useful for Zone 9 gardeners who want to get ahead of the fall season before outdoor conditions are ideal.
Start seeds indoors, allow seedlings to establish, and transplant once the weather begins to cool.
When transplanting, set plants at the same depth they were growing in their containers and water them thoroughly after planting.
Water Kale Consistently
Kale produces the best leaves when soil moisture remains steady.
The goal is consistent, deep watering without waterlogging the soil.
Irregular watering can cause uneven growth and reduce leaf quality. Hot, dry conditions increase the risk of wilting and tougher leaves.
During cool winter weather, irrigation needs may be lower.
As temperatures rise, monitor soil moisture more closely.
Fertilizing Kale
Kale is a moderate-to-heavy nitrogen feeder because the crop is grown for leaves.
Start with a fertile bed.
Before Planting
One to three weeks before planting, incorporate compost or organic matter and apply fertilizer according to a soil test.
If fertility is low and no soil test is available, use a modest balanced fertilizer.
At Planting
Transplants can receive starter fertilizer if needed, but avoid concentrated fertilizer directly against roots or stems.
Early Growth
Once seedlings have been thinned or transplants are established, apply a light nitrogen side-dressing to encourage healthy dark-green leaf growth.
Continued Production
About four to six weeks later, apply another light feeding only if plants become pale or growth slows.
Additional fertilizer may be useful during a long harvest season, particularly in sandy soil or after heavy rainfall has leached nutrients.
Avoid overfeeding late in the season.
Too much nitrogen can produce soft growth and is unnecessary if plants are already healthy.
Mulch Around Kale
A light organic mulch can be especially useful in Zone 9.
Mulch helps:
- conserve soil moisture
- moderate soil temperature
- reduce weed competition
- protect soil during heavy rain
Keep mulch slightly away from the plant stems to improve airflow around the crown.
Growing Kale in Containers
Kale adapts well to containers.
Choose a pot large enough to support a mature plant and use a quality, well-draining potting mix.
Containers are useful in Zone 9 because they can be moved into partial afternoon shade when temperatures start climbing.
Container-grown kale may need more frequent watering than plants in garden beds, so check moisture regularly.
Kale and Cold Weather
Kale is one of the most cold-tolerant vegetables commonly grown in Zone 9.
Established plants handle temperatures around 32°F very well, and cool weather often improves sweetness and tenderness.
Young plants can be injured below about 25°F, but mature kale often survives light freezes.
If a hard freeze is forecast, frost cloth can help protect leaves and prolong the harvest.
What Happens When Kale Gets Too Hot?
Kale can keep growing as temperatures rise, but quality usually declines.
Above about 75–80°F, leaves may become tougher or more bitter and insect pressure can increase.
Hot, dry weather also raises the risk of wilting.
This is why spring kale should be planted early and harvested aggressively before summer conditions arrive.
Watch for Imported Cabbageworms
Imported cabbageworms are among the most common kale pests.
The caterpillars are velvety green and chew large irregular holes through leaves.
When populations are high, they can remove substantial leaf area and contaminate harvested leaves with frass.
Check the undersides of leaves regularly.
Early detection makes infestations much easier to manage.
Cabbage Loopers
Cabbage loopers are green caterpillars that move with a distinctive looping motion.
They chew ragged holes through leaves and can reduce the amount of usable foliage quickly when populations become large.
Inspect plants often during fall and spring.
Diamondback Moths
Diamondback moth larvae are small green caterpillars that usually feed on leaf undersides.
Early feeding often appears as translucent window-like patches.
As larvae grow, they chew small holes throughout the foliage.
Cabbage Aphids
Cabbage aphids often form dense gray-green colonies on young leaves and stems.
Feeding can cause curling, yellowing, stunting, and contamination of leaves.
They can be especially troublesome during mild cool-season weather.
Flea Beetles
Flea beetles are most damaging to seedlings and young transplants.
They chew numerous small round holes that give leaves a shot-hole appearance.
Heavy feeding can weaken plants before they become established.
Prevent Kale Diseases
Several important kale diseases are strongly influenced by moisture and crop rotation.
Black Rot
Black rot produces yellow V-shaped lesions that move inward from leaf margins.
Veins may darken, and severe infection can cause leaf death and plant stunting.
Clubroot
Clubroot causes enlarged, swollen roots.
Aboveground plants often look stunted or yellow and may wilt even when soil moisture is adequate.
Because clubroot can persist in soil, crop rotation is particularly important.
Downy Mildew
Downy mildew is favored by cool, wet, humid weather.
Pale-yellow patches appear on leaf surfaces, with white-to-gray growth underneath.
Alternaria Leaf Spot
Alternaria produces dark circular lesions, often with target-like rings.
Heavy disease can reduce usable leaf area substantially.
White Rust
White rust produces raised white pustules, often on the undersides of leaves.
Severe infection can distort foliage and reduce harvest quality.
Good airflow, proper spacing, crop rotation, and avoiding prolonged leaf wetness can all help reduce disease pressure.
Rotate Kale With Non-Brassica Crops
Kale belongs to the Brassicaceae family.
That means it shares many pests and diseases with:
- cabbage
- broccoli
- cauliflower
- collard greens
- Brussels sprouts
Avoid repeatedly planting these crops in the same location year after year.
Rotating into unrelated vegetables helps reduce the buildup of pests and soilborne diseases.
Companion Plants for Kale
The kale crop profile lists several companion and insectary plants that can fit well around a kale bed:
- Sweet alyssum
- Dill
- Cilantro
- Calendula
- Marigolds
These are especially useful for diversifying a vegetable bed and attracting beneficial insects.
How to Harvest Kale
Kale is one of the easiest vegetables to harvest continuously.
Begin once individual leaves reach usable size.
Harvest the largest lower leaves first, leaving the central growing point and several younger leaves intact.
This allows the plant to continue producing new foliage from the center.
Use clean scissors or pruners and cut leaves close to the stem.
Baby leaves can be harvested early, while mature leaves should be picked before they become excessively tough or yellow.
How Long Does Kale Take to Grow?
A useful standard for kale in Zone 9 is about 50 days to maturity, although baby leaves can be harvested earlier.
Because individual outer leaves can be removed while the plant continues growing, a single kale planting can produce for weeks or even months during favorable cool weather.
The Best Way to Grow Kale in Zone 9
The most successful Zone 9 kale strategy is simple:
Plant early enough that most growth happens during cool weather.
For fall, begin establishing plants in late summer or early fall and harvest through winter.
For spring, get plants established as early as practical so you can harvest before temperatures remain above the mid-70s.
Give kale fertile soil, full sun, steady moisture, and enough nitrogen to support leafy growth. Inspect plants regularly for cabbageworms, loopers, aphids, and other Brassica pests.
Then harvest the lower leaves frequently rather than waiting to cut the entire plant.
With good timing, kale can be one of the longest-producing vegetables in the Zone 9 cool-season garden.
For cultivar details, exact planting specifications, pest and disease references, and crop relationships, see the Zone 9 Vegetable Garden Profile: Kale.