
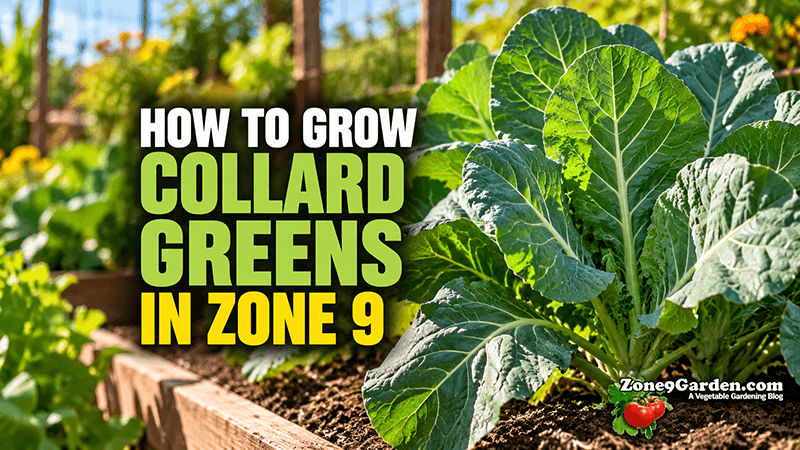
Collard greens are one of the most dependable cool-season vegetables to grow in Zone 9. They tolerate cold weather, produce large nutritious leaves, and can provide repeated harvests from the same plants throughout fall, winter, and early spring.
Unlike cabbage, which develops a compact head, collard greens produce an open arrangement of broad leaves. Gardeners can harvest the largest outer leaves while allowing the center of the plant to continue growing.
This makes collards an excellent choice for anyone who wants a steady supply of fresh greens rather than a single harvest.
For most Zone 9 gardeners, the best time to plant collard greens is from August through November for fall and winter production, with another planting opportunity from January through early March.
However, planting dates vary depending on your location. Gardeners in Florida, Texas, Arizona, and California may experience very different winter conditions despite sharing the same USDA hardiness zone.

Collard greens are particularly valuable in Zone 9 because they tolerate frost and warmer conditions better than many other members of the cabbage family.
The key to successful collard production is planting at the right time, choosing suitable varieties, maintaining fertile soil, watering consistently, and harvesting leaves regularly.
With proper care, a small planting of collard greens can provide fresh vegetables for several months.
Can You Grow Collard Greens in Zone 9?
Yes. Collard greens grow exceptionally well in Zone 9, particularly during fall, winter, and early spring.
Collard greens (Brassica oleracea var. viridis) belong to the Brassicaceae family, commonly called the cabbage or mustard family.
This family also includes broccoli, cauliflower, kale, Brussels sprouts, and cabbage.
Although these vegetables are closely related, collards have a distinct growing habit.
Rather than forming a tight head, collards produce large leaves along an upright stem. The lower leaves can be harvested individually while new growth continues developing at the top.
One of the biggest advantages of growing collards in Zone 9 is their tolerance for cool weather.
Established plants can withstand light frost, and cool temperatures often improve leaf flavor and tenderness.
Collards also tolerate warmer conditions better than many other cool-season leafy vegetables.
However, prolonged heat can still reduce leaf quality, increase bitterness, and encourage tougher growth.
For the best results, schedule most of your collard production during the cooler months.
When Should You Plant Collard Greens in Zone 9?
Timing is one of the most important factors in successfully growing collard greens.
Although collards tolerate a wide range of temperatures, they generally produce their best-quality leaves during mild weather.
In much of Zone 9, fall is the primary planting season.
Winter and early spring can also provide excellent growing conditions.
Zone 9 Collard Greens Planting Calendar
| Planting Activity | Fall / Winter | Spring |
|---|---|---|
| Start Seeds Indoors | July 15 – August 31 | December 15 – January 31 |
| Direct Sow Outdoors | August 15 – November 15 | January 1 – March 1 |
| Transplant Outdoors | September 1 – November 30 | January 15 – March 15 |
| General Harvest Window | October 15 – March 31 | March 1 – May 31 |
| Succession Planting | Every 2–3 weeks | Every 2–3 weeks while cool weather remains |
These are broad Zone 9 planning windows from our verified crop database, not guaranteed dates for every location.
For example, UF/IFAS provides different collard planting windows across Florida:
- North Florida: August through February
- Central Florida: September through February
- South Florida: September through January
This illustrates why local weather conditions matter more than the USDA hardiness zone alone.
For additional seasonal planning, see our Zone 9 Fall Planting Guide and Zone 9 Winter Planting Guide.
Can You Plant Collard Greens in December?
Yes.
December is an excellent month for growing collard greens in many Zone 9 gardens.
Established plants often perform particularly well during the cooler temperatures of December.
In warmer Zone 9b locations, gardeners may also be able to transplant young collards or direct sow additional seeds.
However, December planting is not equally suitable everywhere.
In colder Zone 9a locations, newly planted seedlings may grow slowly during periods of cold weather and short daylight.
Gardeners in these areas often benefit from establishing collards during fall so the plants are already productive when winter arrives.
December is also an excellent time to harvest mature leaves from collards planted in September, October, or November.
Can Collard Greens Be Planted Too Early?
Yes.
Although collards tolerate warmer weather better than many other brassicas, planting during extreme late-summer heat can create problems.
Potential difficulties include:
- Rapid drying of the seedbed
- Heat stress on young transplants
- Increased watering requirements
- Tougher or more bitter leaves
- Greater insect pressure
- Reduced transplant establishment
In hotter Zone 9 locations, starting seeds indoors during late summer and transplanting after temperatures begin cooling may be more dependable than direct sowing outdoors.
Can Collard Greens Be Planted Too Late?
Yes, particularly when planting for a spring harvest.
Collards can tolerate cool weather, but they need enough time to develop a healthy plant before sustained heat arrives.
Late winter plantings may establish successfully but encounter increasingly warm conditions before producing a substantial harvest.
In colder Zone 9a gardens, very late fall sowings may also develop slowly during winter.
Choose planting dates that allow plants to establish during favorable weather.
Choosing the Best Collard Green Varieties for Zone 9
Several collard varieties perform well in Zone 9.
Some are traditional open-pollinated varieties, while others are hybrids selected for uniform growth, vigor, or ease of harvesting.
Choosing the right variety can improve productivity and make harvesting easier.
Georgia
Georgia is a traditional open-pollinated collard variety recommended by UF/IFAS.
It produces large, broad, blue-green leaves and has long been popular in Southern vegetable gardens.
Georgia is an excellent choice for gardeners who want a classic collard with generous leaf production.
It performs well in fall and winter gardens when provided with adequate moisture and fertility.
Georgia Southern
Georgia Southern is another traditional collard variety.
Texas A&M AgriLife Extension recommends it for home vegetable gardens.
It is known for its large leaves and suitability for Southern growing conditions.
Georgia Southern is a good choice for gardeners interested in a dependable, traditional collard for cooking.
Vates
Vates is a relatively compact collard variety known for good cold tolerance.
UF/IFAS includes it among recommended varieties.
Its compact growing habit makes it particularly useful for smaller gardens and raised beds.
Vates is an excellent choice for gardeners who want productive collards without extremely large plants.
Flash
Flash is a hybrid collard variety recommended by UF/IFAS.
It produces vigorous, relatively uniform plants.
Flash is particularly useful for repeated leaf harvesting because plants can maintain steady production under favorable conditions.
Gardeners interested in harvesting collards over an extended period should consider this variety.
Top Bunch
Top Bunch is a hybrid collard known for its upright growth habit.
Its uniform leaves and plant structure make harvesting relatively convenient.
UF/IFAS includes Top Bunch among recommended varieties.
It is a useful choice for gardeners who want an organized, productive collard planting.
Hi Crop
Hi Crop is another hybrid collard included in UF/IFAS variety recommendations.
It is an option for gardeners interested in comparing hybrid varieties with traditional collards.
Like other collards, it performs best with adequate fertility, consistent moisture, and favorable temperatures.
Bull Dog
Bull Dog is a hybrid collard included in UF/IFAS cultivar recommendations.
It provides another option for gardeners seeking modern collard varieties.
Check the seed supplier’s description for specific growth characteristics and expected maturity.
Blue Max
Blue Max is a collard variety recommended by Texas A&M for fall vegetable gardens.
It is worth considering for gardeners growing collards in Texas and other parts of Zone 9.
As with other varieties, local performance depends on planting time, soil conditions, and weather.
Which Collard Variety Should You Choose?
For beginners, Georgia, Georgia Southern, and Vates are excellent starting points.
For gardeners interested in vigorous hybrids, Flash and Top Bunch are good choices.
For smaller gardens, Vates is particularly appealing because of its relatively compact growth.
Growing two or three varieties can help determine which performs best in your particular Zone 9 climate.
Choosing the Best Location
Collard greens grow best in full sun.
Choose a location receiving approximately 6–8 hours of direct sunlight daily.
Adequate sunlight encourages strong leaf production and healthy plant development.
Collards can tolerate some light partial shade, especially in warmer climates, but excessive shade may reduce growth.
Good drainage is equally important.
Collards do not perform well in soil that remains constantly saturated.
Poor drainage can interfere with root development and increase the risk of disease.
Raised beds are particularly useful where native soil is compacted or poorly drained.
Avoid planting in areas where water collects after heavy rainfall.
Preparing the Soil for Collard Greens
Proper soil preparation helps collards develop strong roots and produce large, healthy leaves.
Collards prefer fertile, deep, well-drained soil with adequate organic matter.
Loam or sandy loam is ideal.
Unlike carrots or beets, collards are grown primarily for their leaves rather than enlarged roots.
However, healthy roots are still essential for supporting vigorous leaf growth.
Before planting:
- Remove weeds and old plant debris.
- Loosen compacted soil.
- Incorporate finished compost if additional organic matter is needed.
- Check drainage.
- Correct nutrient deficiencies according to a soil test.
- Level the planting area.
- Water lightly before sowing or transplanting if the soil is dry.
Avoid planting collards into compacted, waterlogged soil.
A well-prepared bed supports better root development and makes ongoing care easier.
What Soil pH Do Collard Greens Prefer?
Collards generally grow best in slightly acidic soil.
A pH of approximately 6.0–6.5 is a useful target.
Extremely acidic soil can interfere with nutrient availability and may increase problems with certain soilborne diseases.
A soil test is the best way to determine whether lime or other amendments are necessary.
Avoid applying lime or fertilizer automatically without knowing your soil conditions.
How to Plant Collard Greens in Zone 9
Collard greens can be grown from seeds planted directly into the garden or from transplants.
Both methods can work well in Zone 9.
Transplants are particularly useful when gardeners want to establish a fall crop before the weather becomes ideal for direct sowing.
Step 1: Prepare the Planting Area
Begin with loose, fertile, well-drained soil.
Remove weeds and debris.
The soil should be moist but not saturated.
If planting transplants, prepare holes large enough to accommodate the root systems without crowding.
Step 2: Plant Seeds at the Correct Depth
Sow collard seeds approximately ¼–½ inch deep.
Cover lightly with fine soil and gently firm the surface.
Avoid planting too deeply because small seeds may struggle to emerge.
Step 3: Space the Plants
For mature collard plants, allow approximately 12–18 inches between plants.
Very large varieties may benefit from spacing up to 24 inches.
Traditional garden rows can be spaced approximately 24–36 inches apart.
Proper spacing improves airflow, reduces competition, and makes harvesting easier.
Step 4: Water Carefully
After sowing seeds or setting transplants, water gently.
Maintain consistent moisture during establishment.
Avoid using a strong stream of water that washes away seeds or exposes young roots.
Step 5: Thin Seedlings
If direct sowing, thin seedlings after they develop true leaves.
Remove excess plants so the remaining collards have adequate growing space.
Crowded collards may produce smaller leaves and experience greater competition for nutrients and moisture.
Step 6: Establish Transplants
Set transplants at approximately the same depth they were growing in their containers.
Gently firm soil around the root ball and water thoroughly.
Monitor young plants closely during the first week, particularly during warm or windy weather.
How Long Do Collard Seeds Take to Germinate?
Collard seeds generally germinate in approximately 5–10 days under favorable conditions.
Germination may take longer in cold soil.
The verified crop database identifies approximately 45°F as a practical lower germination limit.
Seeds can germinate across a broad range of temperatures, but establishment is generally easier under moderate conditions.
Collard Green Germination Temperature Guide
| Soil Temperature | Expected Conditions |
|---|---|
| Around 45°F | Germination possible but slow |
| 45–60°F | Cool conditions; emergence may be delayed |
| 60–70°F | Excellent practical planting and establishment range |
| Around 77°F | Favorable temperature for rapid seed germination |
| 77–85°F | Germination possible, but monitor moisture and heat stress |
Warm soil does not automatically mean ideal growing weather.
Although collard seeds can germinate in relatively warm soil, the plants generally produce their best-quality leaves under cooler conditions.
Maintain consistent moisture until seedlings emerge.
Avoid allowing the seedbed to dry completely.
Watering Collard Greens in Zone 9
Collards need consistent moisture to produce tender, healthy leaves.
Irregular watering can stress plants and reduce leaf quality.
Prolonged drought may encourage tougher foliage and slower growth.
However, constantly saturated soil can damage roots and increase disease problems.
The goal is steady moisture without waterlogging.
How Often Should You Water Collard Greens?
Watering frequency depends on:
- Rainfall
- Soil texture
- Temperature
- Wind
- Mulch
- Plant size
- Raised beds versus in-ground gardens
Sandy soils may require more frequent watering than heavier soils.
During cool winter weather, the soil may remain moist for several days after rainfall.
Rather than following a rigid daily schedule, check soil moisture before irrigating.
Water deeply enough to moisten the root zone.
Avoid unnecessary overhead irrigation, especially during humid weather.
Should You Mulch Collard Greens?
Yes.
Organic mulch can help conserve moisture, reduce weeds, and moderate soil temperatures.
Suitable materials include clean straw, shredded leaves, and other appropriate organic mulches.
Keep thick mulch away from young stems.
Mulching is particularly useful in sandy Zone 9 gardens where soil moisture can fluctuate quickly.
Fertilizing Collard Greens
Collards are moderate-to-heavy feeders, particularly when harvested repeatedly.
Because gardeners grow collards primarily for their leaves, adequate nitrogen is important for healthy foliage.
However, excessive fertilizer can still cause problems.
Too much nitrogen may encourage overly soft growth and unnecessary nutrient loss.
A soil test is the best starting point for determining fertilizer requirements.
Collard Greens Fertilizer Schedule
| Growth Stage | Timing | Recommended Action |
|---|---|---|
| Pre-Plant | 1–3 weeks before planting | Incorporate finished compost and apply soil-test-recommended fertilizer if needed |
| At Planting | Day 0 | Set transplants at their original depth and water thoroughly; use starter fertilizer only if needed |
| Early Growth | After thinning or transplant establishment | Apply a light nitrogen side-dressing if needed |
| Continued Leaf Growth | Approximately 4–6 weeks later | Repeat a light feeding only if foliage becomes pale or growth slows |
| Extended Harvest | As needed | Supplement lightly if prolonged harvesting, sandy soil, or heavy rainfall indicates nutrient loss |
Texas A&M AgriLife Extension recommends additional fertilizer after collards are thinned to their final spacing or when foliage becomes pale.
However, routine heavy fertilization is unnecessary in adequately prepared soil.
If plants are growing vigorously and producing dark-green leaves, additional fertilizer may provide little benefit.
For more information about fertilizer nutrients, see our NPK: Nitrogen, Phosphorus, and Potassium Explained articles.
Managing Weeds Around Collard Greens
Weed control is particularly important while young collards are establishing.
Weeds compete with developing plants for sunlight, water, and nutrients.
Remove weeds before they become large.
Hand pulling or shallow cultivation is generally preferable near established plants.
Avoid damaging collard roots during weeding.
Once collards develop a large canopy, they may shade some competing weeds.
However, weeds should still be removed before they produce seeds or interfere with harvesting.
Growing Collard Greens in Raised Beds
Raised beds are an excellent option for growing collards in Zone 9.
They provide several advantages:
- Improved drainage
- Easier soil preparation
- Reduced compaction
- Convenient spacing
- Better access for harvesting
- Greater control over soil quality
A raised bed filled with fertile, well-drained soil can support vigorous collard production.
However, collards can become large plants.
Avoid overcrowding.
Provide approximately 12–18 inches between most plants, with additional room for particularly large varieties.
Raised beds may also dry more quickly than traditional garden soil.
Monitor moisture during establishment and warm weather.
Growing Collard Greens in Containers
Collards can also grow successfully in containers.
Compact varieties such as Vates are particularly useful for gardeners with patios, balconies, or limited garden space.
Choose a container large enough to accommodate the mature plant.
A container approximately 12 inches deep and 12–18 inches wide is a practical starting point for one compact collard, although larger containers provide more root space and more consistent moisture.
Drainage holes are essential.
Use a quality potting mix rather than dense garden soil.
Container-grown collards may require more frequent watering and occasional supplemental feeding because nutrients can leach from the growing medium.
Avoid overcrowding multiple mature plants into a small container.
Common Collard Green Pests in Zone 9
Collards can be affected by several insect pests during fall, winter, and spring.
Because the leaves are the edible portion of the crop, insect damage can directly reduce harvest quality.
Regular inspection is one of the best ways to prevent severe infestations.
Flea Beetles
Flea beetles are small insects that chew numerous tiny holes in leaves.
Their feeding often creates a scattered pattern of round pinholes.
Young seedlings and newly established transplants are particularly vulnerable.
Heavy feeding can stunt plants before they become established.
Lightweight insect netting or row covers installed before infestation can help protect young collards.
Cabbage Aphids
Cabbage aphids are small gray-green insects that commonly gather on young leaves and stems.
They feed on plant sap and may cause curling, yellowing, or stunted growth.
Dense colonies can also contaminate harvested leaves.
Aphids may remain active during mild Zone 9 winters.
Inspect the undersides of leaves and tender new growth regularly.
Encourage beneficial insects and address infestations before colonies become severe.
Diamondback Moths
Diamondback moth larvae are small green caterpillars that feed on collard foliage.
They often begin feeding on leaf undersides.
Early damage may appear as translucent patches where only part of the leaf tissue has been removed.
As feeding continues, small holes develop.
Heavy infestations can significantly reduce usable leaf area.
Inspect plants regularly, especially during mild weather.
Cabbage Loopers
Cabbage loopers are green caterpillars that move by arching their bodies into a loop.
They chew irregular holes in collard leaves.
Large populations can remove substantial amounts of foliage.
Look for caterpillars, eggs, and feeding damage on both sides of the leaves.
Early detection makes control easier.
Imported Cabbageworms
Imported cabbageworms are velvety green caterpillars that feed on brassica leaves.
They create irregular holes and may leave dark droppings on foliage.
Severe infestations can skeletonize leaves.
Regular inspection and removal of caterpillars can help reduce damage in small gardens.
For all pest problems, identify the insect before selecting a treatment. If a pesticide is necessary, choose a product specifically labeled for collard greens and the target pest, and follow the label directions, including harvest intervals.
Common Collard Green Diseases in Zone 9
Collards can develop several diseases, particularly during periods of prolonged moisture and humidity.
Good drainage, adequate spacing, clean gardening practices, and crop rotation help reduce disease pressure.
Bacterial Leaf Spot and Blight
Bacterial leaf spot can develop during cool-to-mild wet weather or periods of prolonged leaf wetness.
Symptoms include small dark or water-soaked spots on leaves.
As the disease progresses, spots may enlarge and merge into damaged areas.
Severe infections reduce usable leaf area.
Avoid unnecessary overhead watering and remove heavily diseased plant material.
Alternaria Leaf Spot
Alternaria leaf spot commonly develops during mild-to-warm humid weather.
Symptoms include small dark circular lesions that may develop concentric rings.
These markings sometimes resemble a target.
Severe infections can cause leaf blighting and reduce harvest quality.
Improve airflow, avoid prolonged leaf wetness, and remove infected debris.
Downy Mildew
Downy mildew is favored by cool, humid, or wet conditions.
Symptoms may include pale-yellow patches on upper leaf surfaces.
White or grayish growth may appear on leaf undersides.
Severe infections can cause browning and loss of usable foliage.
Provide adequate spacing and avoid unnecessary leaf wetness.
Clubroot
Clubroot is a soilborne disease that affects brassica roots.
Infected roots may become swollen, distorted, and club-shaped.
Aboveground symptoms include stunted growth, yellowing, and wilting during warm weather despite adequate soil moisture.
The disease can be particularly troublesome in acidic, infested soil.
Avoid moving contaminated soil between garden beds and follow local Extension recommendations for managing affected areas.
Black Rot
Black rot is a bacterial disease that can affect collards during warm, wet, or humid weather.
One of its characteristic symptoms is the development of yellow V-shaped lesions extending inward from leaf margins.
Leaf veins may darken as the disease progresses.
Severe infections can cause leaf death and reduced plant vigor.
Use clean planting material, avoid handling plants when foliage is wet, and rotate brassica crops where disease has occurred.
Common Collard Green Growing Problems
Even when insects and diseases are absent, environmental conditions can affect collard growth.
Why Are My Collard Leaves Turning Yellow?
Yellowing leaves can result from several causes, including:
- Nitrogen deficiency
- Overwatering
- Poor drainage
- Root damage
- Disease
- Natural aging of older leaves
If older leaves are yellowing while the rest of the plant remains healthy, normal leaf aging may be responsible.
If the entire plant becomes pale or growth slows, inspect soil moisture and fertility.
Do not automatically add fertilizer without checking for other problems.
Why Are My Collard Greens Bitter?
Collard leaves may become more bitter during prolonged hot weather or when plants experience stress.
Older leaves can also become tougher and stronger flavored.
For better eating quality, grow collards during cool weather, maintain consistent moisture, and harvest tender leaves regularly.
Why Are My Collard Greens Growing Slowly?
Slow growth may result from:
- Cold soil
- Short winter days
- Poor fertility
- Insufficient sunlight
- Root problems
- Overcrowding
- Water stress
Growth naturally slows during cold, cloudy weather.
Avoid overfertilizing plants simply because winter growth is slower than expected.
Why Are My Collard Leaves Full of Holes?
Holes are often caused by caterpillars or flea beetles.
Inspect both sides of the leaves.
Small round pinholes suggest flea beetle feeding.
Larger irregular holes may indicate cabbage loopers, imported cabbageworms, or other caterpillars.
Why Are My Collards Bolting?
Bolting occurs when a plant begins producing a flowering stalk.
Collards are biennial plants, and exposure to cool temperatures followed by warming conditions can encourage flowering in mature plants.
Once flowering begins, leaf quality may decline.
Harvest usable leaves promptly.
Succession Planting Collard Greens in Zone 9
Succession planting is an effective way to maintain a steady supply of collard greens.
Instead of planting every seed or transplant at once, establish smaller groups every two or three weeks while conditions remain favorable.
For example, a gardener might transplant several collards in September, another group in early October, and additional plants later in October.
This provides plants at different stages of development.
However, collards are particularly well suited to repeated harvesting.
Unlike crops that must be removed entirely at harvest, healthy collard plants can continue producing new leaves after older leaves are picked.
As a result, gardeners often need fewer succession plantings than they would for vegetables such as radishes.
For additional planning advice, read our Succession Planting in Zone 9 guide.
Companion Planting and Crop Rotation
Collards can share a garden with other cool-season vegetables.
Lettuce, carrots, beets, and onions may be practical neighbors when spacing and sunlight requirements are considered.
The main benefits come from compatible growing conditions and efficient use of garden space.
Companion planting does not guarantee improved yields or pest control.
More importantly, avoid overcrowding collards or placing tall plants where they shade smaller vegetables.
Crop Rotation for Collard Greens
Collards belong to the Brassicaceae family.
Other members include:
- Broccoli
- Cabbage
- Cauliflower
- Kale
- Brussels sprouts
- Mustard greens
- Turnips
- Radishes
These crops can share several pests and diseases.
Avoid repeatedly growing brassicas in the same garden bed where soilborne disease problems have occurred.
Rotating to unrelated crop families can help reduce the buildup of certain pests and pathogens.
When Are Collard Greens Ready to Harvest in Zone 9?
Collard greens are generally ready for their first harvest when plants have developed several healthy, full-sized leaves.
The exact timing depends on the variety, planting date, and weather.
Our verified crop database does not specify a single days-to-maturity value, so use the seed packet’s maturity estimate as a starting point.
During cool winter weather, growth may be slower than expected.
How Do You Know When Collards Are Ready?
Look for leaves that are:
- Full-sized for the variety
- Deep green
- Firm but tender
- Free of significant yellowing
- Free of major pest or disease damage
You do not need to wait until the entire plant reaches its maximum size.
Collards are particularly useful because leaves can be harvested gradually.
Can You Harvest Collards Throughout Winter?
Yes.
Established collards can remain productive throughout much of winter in Zone 9.
Cool weather often improves leaf tenderness and flavor.
However, severe freezes can damage foliage, especially on young or actively growing plants.
Harvest mature leaves before unusually severe cold when practical.
How to Harvest Collard Greens
Harvesting collards is straightforward.
For repeated harvests, remove the largest lower leaves first.
Leave the central growing point and several younger leaves intact.
This allows the plant to continue producing new foliage.
To harvest:
- Select healthy, mature outer leaves.
- Hold the leaf near its base.
- Cut cleanly near the main stem.
- Avoid damaging the central growing point.
- Remove yellowing or damaged leaves.
- Repeat harvesting as new leaves mature.
Avoid removing too many leaves at once.
Plants need adequate foliage to continue growing.
Can You Harvest the Entire Plant?
Yes.
For a one-time harvest, the entire collard plant can be cut near the soil line.
However, harvesting outer leaves individually is generally better when your goal is extended production.
Storing Homegrown Collard Greens
Fresh collard greens are best used soon after harvesting.
Leaves can lose moisture and become limp when stored improperly.
After harvesting:
- Remove damaged or yellow leaves.
- Shake off loose soil.
- Keep the leaves cool.
- Refrigerate promptly.
- Wash thoroughly before cooking or eating.
Store collards in a produce bag or suitable container that helps retain moisture without allowing excessive condensation.
For longer storage, collard greens can be blanched and frozen using appropriate food-preservation instructions.
Zone 9a vs. Zone 9b: Does It Matter for Collard Greens?
Yes, although local weather patterns are often more important than the hardiness zone designation alone.
USDA Zone 9 is divided into two subzones based on average annual extreme minimum temperatures:
- Zone 9a: 20–25°F
- Zone 9b: 25–30°F
These classifications describe winter temperature extremes rather than typical growing-season conditions.
Growing Collard Greens in Zone 9a
Zone 9a gardeners may experience more frequent freezes.
Established collards tolerate light frost well.
However, temperatures below approximately 25–28°F can increase the risk of significant injury, particularly to young or actively growing plants.
Protect vulnerable plants during severe freezes.
Fall planting is particularly useful because it allows collards to establish before the coldest winter weather arrives.
Growing Collard Greens in Zone 9b
Zone 9b generally experiences milder winter extremes.
Many gardeners can continue growing and harvesting collards throughout winter.
However, warmer spring weather may arrive earlier.
This can reduce leaf tenderness and shorten the period of ideal growing conditions.
Monitor temperatures and harvest regularly as spring approaches.
Regional Differences Across Zone 9
Zone 9 includes several different climates.
The best planting schedule for one region may not work well in another.
Florida and the Southeast
Collards are a traditional and dependable cool-season vegetable in Florida.
Mild winters provide favorable growing conditions.
However, humidity and rainfall can increase disease pressure.
Sandy soils may also require more careful watering and nutrient management.
Texas and the Gulf Coast
Collards perform well during fall and winter.
However, temperatures can change rapidly.
Gardeners may experience warm periods followed by freezing weather.
Prepare frost protection when severe cold is expected.
Arizona
Sunny winter days and cool nights can provide excellent collard-growing conditions.
However, dry air and rapid soil moisture loss may require careful irrigation.
In hotter desert locations, delaying fall planting until temperatures moderate can improve establishment.
California
Many California Zone 9 gardens provide favorable conditions for cool-season collard production.
Coastal areas may experience extended periods of mild weather.
Inland valleys may have colder nights, fog, and prolonged wet conditions.
Adjust planting dates and watering schedules to local conditions.
Common Mistakes When Growing Collard Greens in Zone 9
Many collard-growing problems can be prevented with good planning.
Common mistakes include:
- Planting during extreme summer heat
- Waiting too long before spring temperatures rise
- Overcrowding mature plants
- Growing collards in poorly drained soil
- Allowing plants to dry during rapid leaf production
- Applying excessive fertilizer
- Ignoring caterpillars and aphids
- Failing to inspect leaf undersides
- Planting brassicas repeatedly in disease-affected beds
- Harvesting too many leaves at once
- Damaging the central growing point
- Leaving mature leaves on plants until they become tough
The most important factors are planting at the right time, maintaining healthy soil, watering consistently, and harvesting regularly.
Frequently Asked Questions About Growing Collard Greens in Zone 9
What is the best month to plant collard greens in Zone 9?
September, October, and November are excellent planting months in many Zone 9 locations.
August planting can also work in cooler areas or when seeds are started indoors.
January and February provide additional planting opportunities where temperatures remain favorable.
Can I plant collard greens in December?
Yes.
December is a good month for growing collards in many Zone 9 gardens.
Established fall plantings can provide excellent winter harvests.
New sowings and transplants may also succeed in suitable locations.
What are the best collard green varieties for Zone 9?
Georgia, Georgia Southern, Vates, Flash, Top Bunch, Hi Crop, Bull Dog, and Blue Max are recommended varieties to consider.
The best choice depends on garden space, local conditions, and whether you prefer traditional or hybrid varieties.
Can collard greens grow all winter in Zone 9?
Yes.
Established collards can remain productive throughout much of winter.
Growth may slow during cold weather, but plants often recover and continue producing when temperatures improve.
Should I start collard seeds indoors?
You can.
Starting seeds indoors is particularly useful for fall planting when outdoor temperatures remain hot.
Collards can also be direct sown into the garden during favorable weather.
How deep should I plant collard seeds?
Plant collard seeds approximately ¼–½ inch deep.
Cover lightly with soil and maintain consistent moisture until germination.
How far apart should collards be planted?
Space most collard plants approximately 12–18 inches apart.
Very large plants may need up to 24 inches.
Traditional rows can be spaced 24–36 inches apart.
How long do collard seeds take to germinate?
Collard seeds generally germinate in approximately 5–10 days under favorable conditions.
Cold soil or inconsistent moisture can delay emergence.
Do collard greens need full sun?
Collards perform best with approximately 6–8 hours of direct sunlight daily.
They can tolerate some partial shade, but excessive shade may reduce leaf production.
Can collard greens grow in containers?
Yes.
Choose a large container with adequate drainage.
Compact varieties such as Vates are particularly useful for container gardening.
Can collard greens tolerate frost?
Yes.
Established collards tolerate light frost well.
However, severe freezes can damage foliage, especially on young plants.
Why are my collard greens bitter?
Hot weather, drought stress, and older leaves can contribute to stronger or more bitter flavor.
Cool growing conditions and regular harvesting generally improve eating quality.
How often should I harvest collard greens?
Harvest mature outer leaves as needed.
Regular harvesting can encourage continued production while leaving younger leaves to develop.
Will collard greens grow back after harvesting?
Yes, when harvested correctly.
Removing mature outer leaves while preserving the central growing point allows the plant to continue producing new leaves.
Are collard greens and kale the same thing?
No.
Collards and kale are closely related members of the same species, Brassica oleracea, but they are different cultivated forms.
Collards typically produce broad, relatively smooth leaves, while many kale varieties produce curly or textured foliage.
Final Thoughts
Collard greens are one of the most dependable vegetables for the Zone 9 cool-season garden.
They tolerate frost, produce nutritious leaves, and can provide repeated harvests over several months.
Unlike vegetables harvested only once, collards allow gardeners to remove mature outer leaves while the plant continues growing.
For most Zone 9 gardeners, fall and winter provide the best combination of favorable temperatures and leaf quality.
Choose a suitable variety, prepare fertile well-drained soil, provide consistent moisture, and monitor plants for caterpillars and other pests.
With proper care and regular harvesting, collard greens can become one of the most productive vegetables in your Zone 9 garden.
Related Zone 9 Gardening Guides
- Zone 9 Winter Planting Guide — Discover what to plant during December, January, and February.
- Zone 9 Fall Planting Guide — Plan your cool-season garden before winter arrives.
- How to Grow Beets in Zone 9 — Learn how to grow another dependable cool-season vegetable.
- How to Grow Peas in Zone 9 — Grow English, snap, and snow peas during the cooler months.
- How to Grow Carrots in Zone 9 — Learn when to plant, care for, and harvest carrots.
- Zone 9 Crop Profiles — Explore detailed information for individual vegetables.
- Succession Planting in Zone 9 — Extend your harvest by staggering planting dates.