
Last Updated on November 5, 2026
Mustard greens are one of the easiest and most rewarding cool-season vegetables to grow in Zone 9. They grow quickly, produce an abundance of flavorful leaves, and thrive during the cooler months when many warm-season vegetables struggle.
But growing mustard greens successfully in Zone 9 requires understanding one important factor: timing.
While mustard greens love cool weather, they can become bitter, tough, and quick to bolt when temperatures rise. This makes fall, winter, and early spring the most important growing seasons for gardeners in warmer climates.

Fortunately, Zone 9 provides excellent opportunities to grow mustard greens for several months of the year.
Whether you’re gardening in Florida, Texas, Arizona, or California, mustard greens can be a productive addition to raised beds, traditional vegetable gardens, and containers.
The key is choosing suitable varieties, planting during favorable temperatures, maintaining consistent moisture, and harvesting leaves before they become overgrown.
In this guide, we’ll cover everything you need to know about how to grow mustard greens in Zone 9, including planting dates, recommended varieties, soil preparation, fertilizing, pest control, and harvesting.
Can You Grow Mustard Greens in Zone 9?
Yes! Mustard greens grow exceptionally well in many Zone 9 gardens, especially during the cooler months.
Mustard greens are leafy vegetables belonging to the Brassicaceae family, which also includes cabbage, broccoli, kale, collards, radishes, and turnips. The most familiar leafy mustard greens belong to the species Brassica juncea, although some vegetables sold as mustard greens belong to other closely related species.
Unlike tomatoes and peppers, mustard greens don’t need hot weather to grow. In fact, cooler temperatures generally produce more tender leaves with a milder flavor. Mustard greens offer several advantages for Zone 9 gardeners:
- Fast growth, with many varieties ready for harvest in approximately 35–50 days.
- Excellent production during fall and winter.
- The ability to harvest individual leaves repeatedly.
- Adaptability to raised beds and containers.
- A wide selection of varieties with different flavors and leaf textures.
- Opportunities for succession planting throughout the cool season.
One of the biggest advantages is that you don’t necessarily need to harvest the entire plant at once. By removing mature outer leaves and leaving the growing center intact, you can often enjoy multiple harvests from the same plant.
When Should You Plant Mustard Greens in Zone 9?
For most Zone 9 gardeners, fall through winter is the best time to grow mustard greens. Mustard greens prefer mild temperatures and generally produce their highest-quality leaves before spring heat arrives. However, planting dates vary significantly across Zone 9.
A gardener in Central Florida may have a different planting schedule from someone in coastal California or the low deserts of Arizona. Rather than using one planting calendar for every Zone 9 location, consider your local temperatures and regional Extension recommendations.
Mustard Greens Planting Calendar for Zone 9
| Season | Start Indoors | Direct Sow | Transplant | Harvest |
|---|---|---|---|---|
| Fall | Optional, about 4 weeks before transplanting | Generally late summer through fall as temperatures cool; regional windows vary | When seedlings are established and conditions are suitable | Fall through winter |
| Winter | Usually unnecessary | Suitable in many mild-winter locations | Where frost and weather permit | Winter through early spring |
| Spring | Optional, about 4 weeks before transplanting | Late winter through spring where enough cool weather remains | Before sustained spring heat | Approximately 35–50 days after sowing |
These are seasonal guidelines, not fixed nationwide planting dates.
For example, UF/IFAS provides mustard planting windows extending from August through February in North Florida, September through February in Central Florida, and September through January in South Florida. UC ANR recommendations for Santa Clara County include fall planting around September and October, with additional spring planting opportunities. These regional differences are important because USDA hardiness zones describe winter minimum temperatures, not identical growing seasons.
For additional seasonal information, see our Zone 9 Fall Planting Guide and Zone 9 Winter Planting Guide.
Can Mustard Greens Be Planted in Winter?
Absolutely.
In many Zone 9 locations, winter is one of the best times to grow mustard greens. Cool weather helps maintain leaf quality, and established plants can continue growing during mild winter conditions. However, unusually hard freezes may damage foliage, particularly on young seedlings. Growth may also slow considerably during extended periods of cold or cloudy weather.
Can Mustard Greens Be Planted in Spring?
Yes, but timing becomes increasingly important.
Mustard greens planted in late winter or early spring may grow successfully if they have enough time to mature before temperatures become too warm. As temperatures rise, plants become more likely to bolt. Bolting occurs when the plant begins producing a flowering stalk, often resulting in tougher leaves and stronger flavors.
In warmer Zone 9 locations, spring planting opportunities may be relatively short. For dependable harvests, fall planting is often the better choice.
Choosing the Best Mustard Greens Varieties for Zone 9
Not all mustard greens look or taste the same.
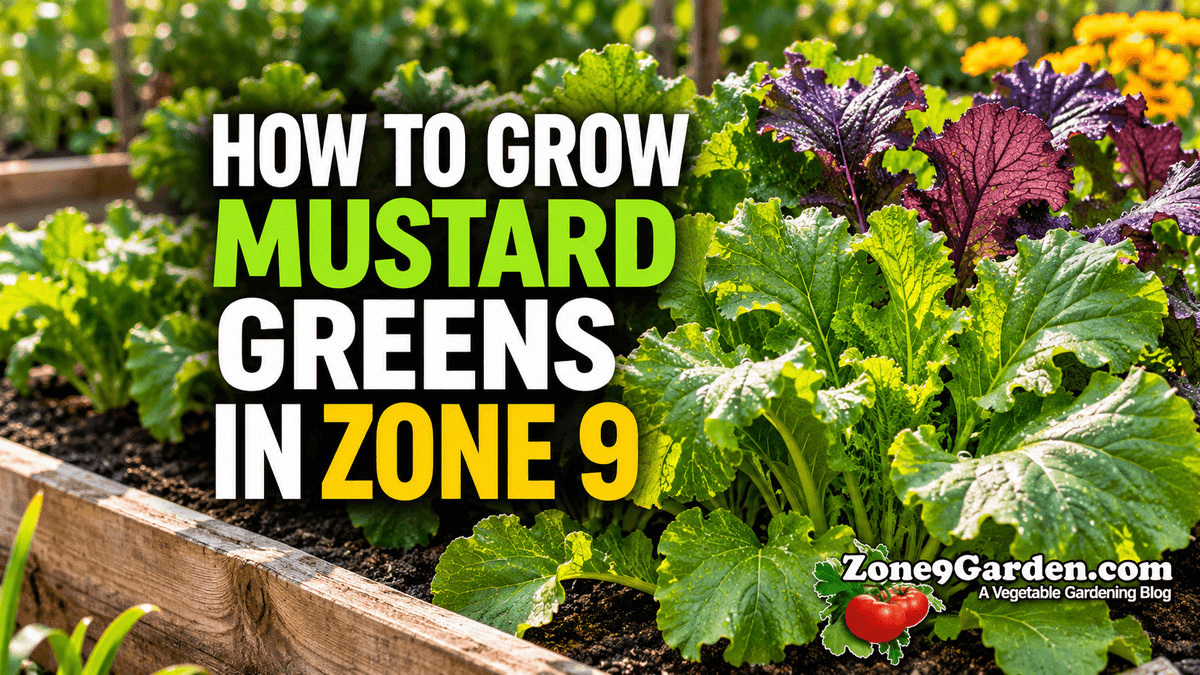
Some varieties produce large, smooth leaves, while others develop curly or deeply serrated foliage. Colors range from bright green to deep purple.
Flavor also varies considerably. Some mustard greens have a mild peppery flavor, while others produce the stronger, spicy taste traditionally associated with southern-style cooked greens. Several varieties are worth considering for Zone 9 gardens.
Florida Broadleaf
Florida Broadleaf is an excellent choice for gardeners who want large, productive leaves.
It produces broad green foliage that works particularly well for cooking. Its relatively smooth leaves are easy to wash and prepare. Florida Broadleaf is included in UF/IFAS and UC ANR mustard recommendations.
Southern Giant Curled
Southern Giant Curled is a traditional mustard variety known for its large, frilly green leaves.
It has the distinctive peppery flavor many gardeners expect from mustard greens. The curled foliage also adds visual interest to vegetable beds. This is a useful variety for gardeners who enjoy harvesting mature leaves for cooking.
Green Wave
Green Wave produces attractive, curled green foliage.
It is another variety listed in UF/IFAS recommendations. Like other mustard greens, it performs best when grown during suitable cool-season conditions.
Red Giant
Red Giant, sometimes called Giant Red, is one of the most visually striking mustard varieties.
Its broad leaves develop purple-red coloring, often with green undertones. The foliage adds color to both the garden and the kitchen. Young leaves can be used in salads, while larger leaves are often cooked.
Tendergreen and Mizuna
Tendergreen and Mizuna are also commonly included in mustard-green growing recommendations.
However, there is an important botanical distinction. These vegetables are often classified under Brassica rapa rather than Brassica juncea. They can be grown as cool-season leafy greens, but gardeners should check the species and variety information on seed packets.
For your first planting, Florida Broadleaf, Southern Giant Curled, Green Wave, or Red Giant are excellent varieties to investigate.
Choosing the Best Location
Mustard greens grow best in a location receiving full sun.
Choose an area that receives approximately six or more hours of direct sunlight whenever possible. During the cooler months, full sun helps support strong leaf development. In warmer weather, some afternoon shade may help reduce heat stress.
Good drainage is equally important.
Mustard greens need consistent moisture, but their roots should not remain in saturated soil. Raised beds are particularly useful in locations where native soil drains poorly. Avoid areas where rainwater collects or remains standing for long periods.
Preparing the Soil for Mustard Greens
Mustard greens grow best in fertile, well-draining soil containing adequate organic matter.
Before planting, remove weeds, rocks, and other debris. Loosen compacted soil so roots can develop without unnecessary restrictions. Incorporating finished compost can help improve soil structure and moisture management.
Mustard greens generally prefer a soil pH of approximately 6.0–7.5, according to UF/IFAS Chinese mustard guidance. A soil test is the best way to determine whether your soil needs amendments.
Good soil preparation can help:
- Improve drainage.
- Support healthy root growth.
- Maintain consistent soil moisture.
- Provide nutrients for leaf development.
- Reduce problems associated with compaction.
Avoid adding excessive fertilizer without knowing what nutrients your soil already contains.
Mustard greens benefit from fertile soil, but more fertilizer doesn’t automatically produce better plants.
How to Plant Mustard Greens in Zone 9
Mustard greens are easy to establish directly from seed.
Although they can be started indoors and transplanted, direct sowing is usually the simplest method for home gardeners.
Step 1: Prepare the Planting Bed
Choose a sunny, well-draining location.
Remove weeds and loosen the upper soil layer.
Break apart large soil clumps and create a reasonably fine seedbed.
Mustard seeds are small, so good contact between the seeds and moist soil is important.
Step 2: Plant the Seeds
Sow mustard seeds approximately ¼–½ inch deep.
Avoid burying them too deeply.
Cover the seeds lightly with soil and gently firm the surface.
Water carefully to avoid washing seeds out of place.
Step 3: Space the Plants
For standard leaf production, space mustard greens approximately 4–8 inches apart.
Rows can generally be spaced about 12–16 inches apart for a compact home-garden planting.
Larger plants or varieties grown to full maturity may require additional space.
If you’re growing mustard greens primarily for baby leaves, closer initial sowing followed by thinning and harvesting can be practical.
Step 4: Keep the Soil Moist
Mustard seeds need consistent moisture during germination.
Check the upper soil layer regularly and water gently when necessary.
Avoid allowing the seedbed to dry out completely.
At the same time, do not keep the soil waterlogged.
Step 5: Watch for Germination
Under favorable conditions, mustard seeds commonly germinate within 3–7 days.
Germination can slow when soil temperatures become too cold.
UF/IFAS reports that germination becomes limited below approximately 40°F and above approximately 85°F.
These are temperature limits, not a verified optimal germination range.
For best results, sow when soil conditions are moderate and suitable for cool-season vegetables.
Step 6: Thin the Seedlings
Once seedlings develop their first true leaves, begin thinning crowded areas.
Remove weaker seedlings to give the remaining plants adequate space.
Overcrowding can cause:
- Smaller leaves.
- Reduced airflow.
- Increased competition for water.
- Greater competition for nutrients.
- Slower growth.
Thinned young greens may be usable in the kitchen if healthy and handled appropriately.
Should You Mulch Mustard Greens?
Mulching can be beneficial, especially in Zone 9 gardens where temperatures and moisture levels can change quickly.
A light layer of clean organic mulch can help:
- Conserve soil moisture.
- Reduce weed growth.
- Moderate soil temperatures.
- Limit soil splash onto leaves.
- Improve soil structure as organic materials break down.
Suitable materials include clean straw, shredded leaves, and other appropriate organic mulches. Avoid burying young seedlings or piling wet mulch directly against their stems. In humid locations, excessive moisture around crowded plants can encourage disease.
Watering Mustard Greens
Consistent watering is one of the most important parts of growing tender mustard greens.
Plants experiencing repeated moisture stress may develop tougher leaves and stronger flavors. Mustard greens generally need evenly moist soil without prolonged saturation. A general vegetable-garden starting point is approximately one inch of water per week from rainfall and irrigation combined. However, this is not a mustard-specific requirement established by averaging the five Extension sources.
Actual water needs depend on:
- Rainfall.
- Soil type.
- Temperature.
- Plant size.
- Sun exposure.
- Whether plants are grown in containers or raised beds.
Sandy soils may dry out more quickly than heavier soils. During cool winter weather, evaporation is often slower, and plants may need less frequent irrigation. Rather than following a rigid watering schedule, check the soil regularly. If it is still moist, wait before watering again. If the root zone is beginning to dry, irrigate thoroughly. Avoid repeated cycles of severe drying followed by heavy watering.
Fertilizing Mustard Greens
Mustard greens are grown primarily for their foliage, so adequate nitrogen is important.
Nitrogen supports the development of healthy green leaves. However, excessive nitrogen can create nutrient imbalances and unnecessary environmental losses. A soil test should guide fertilizer selection and application rates.
Before Planting
Incorporate finished compost where needed and correct documented nutrient deficiencies.
If a complete fertilizer is recommended by your local Extension service, apply it according to the soil test and product directions. Keep concentrated fertilizer away from seeds.
During Early Growth
When mustard greens reach approximately 4–5 inches tall, assess their vigor and leaf color.
Texas A&M AgriLife guidance includes side-dressing during early growth. Apply additional nitrogen if needed, and water after application.
After Repeated Harvests
If you regularly remove mature leaves, continue monitoring regrowth.
Plants that become pale or grow poorly may need additional nutrients, although poor growth can also result from temperature, moisture, root damage, or disease. Do not automatically fertilize after every harvest. Use plant condition and soil-test guidance to determine whether additional feeding is necessary.
Managing Weeds
Mustard greens grow quickly, but young seedlings can still struggle when competing with weeds.
Weeds compete for sunlight, moisture, nutrients, and growing space. Remove weeds before planting and continue monitoring the bed throughout the season. Mulching can help reduce weed growth. When cultivating near established plants, work carefully to avoid damaging shallow roots. Regular hand weeding is often sufficient for small home gardens.
Growing Mustard Greens in Containers
Mustard greens are an excellent choice for container gardening.
Their relatively fast growth and leafy harvest make them useful for patios, balconies, and small spaces. Choose a container with adequate drainage holes and enough room for the plants to develop. Use a quality potting mix rather than compacted garden soil.
Container-grown mustard greens benefit from:
- Adequate sunlight.
- Consistent moisture.
- Good drainage.
- Suitable spacing.
- Regular monitoring for nutrient deficiencies.
Containers often dry out faster than garden beds, especially during warm or windy weather. Check moisture frequently without keeping the potting mix continuously saturated. One advantage of container growing is flexibility. Pots can sometimes be moved into protected locations during unusually cold weather or positioned where plants receive some afternoon shade as temperatures rise.
Common Mustard Greens Pests in Zone 9
Mustard greens belong to the same plant family as cabbage, broccoli, and kale.
As a result, they can attract several insects that commonly feed on brassica vegetables. Regular inspection is the best way to identify problems before they become severe.
Flea Beetles
Flea beetles are small insects that chew numerous tiny holes in leaves.
Damage often resembles small shotgun or pinprick holes.
Young seedlings can be especially vulnerable.
Flea beetles are commonly associated with spring and fall activity, although local conditions vary.
Aphids
Aphids are small, soft-bodied insects that often gather on leaf undersides and tender new growth.
Signs include:
- Curled leaves.
- Yellowing foliage.
- Sticky honeydew.
- Clusters of small insects.
Aphids may remain active during mild winter conditions.
Cabbage Loopers and Imported Cabbageworms
These caterpillars chew irregular holes in mustard leaves.
Look for green caterpillars and dark droppings on the foliage.
Inspect plants frequently, particularly during mild fall and spring weather.
Harlequin Bugs
Harlequin bugs are potential pests of brassica-family vegetables.
Their feeding can cause pale stippling, wilting, and distorted foliage.
They are more likely to be troublesome during warmer periods.
Their importance specifically on mustard greens varies by region.
Diamondback Moth Caterpillars
Diamondback moth larvae feed on brassica leaves.
Young larvae may create translucent patches, while older feeding produces irregular holes.
These pests can remain active during mild weather.
Preventing Pest Problems
Good garden management can reduce pest pressure.
Inspect leaves regularly, including their undersides.
Remove heavily damaged plant material when appropriate.
Avoid allowing severely infested brassica crops to remain unmanaged near new plantings.
Lightweight insect-exclusion netting can help protect young plants when installed before pests arrive and secured properly.
When treatment is necessary, identify the pest first and choose a product specifically labeled for the crop and pest, following all directions.
Common Mustard Greens Diseases
Mustard greens can develop several diseases, particularly when humidity is high or foliage remains wet for extended periods.
The following are potential brassica diseases, not a verified ranking of the five most prevalent mustard diseases nationwide.
Downy Mildew
Downy mildew is favored by cool, humid conditions.
Symptoms may include yellow patches on leaves and grayish or purplish growth underneath.
Improve airflow and avoid unnecessary prolonged leaf wetness.
Alternaria Leaf Spot
Alternaria can cause brown or black leaf spots, sometimes with concentric rings.
Affected leaves may develop yellowing around the spots.
Remove severely affected foliage and avoid spreading infected plant debris.
Black Rot
Black rot can affect brassica-family vegetables.
Characteristic symptoms include yellow V-shaped lesions extending inward from leaf edges and darkened veins.
Its regional importance on mustard greens varies.
Clubroot
Clubroot is a soilborne disease that can cause swollen, distorted roots.
Affected plants may become stunted or wilt despite moist soil.
Avoid moving contaminated soil between garden beds.
Crop rotation and attention to soil conditions are important where clubroot is present.
White Rust
White rust is identified in UF/IFAS Chinese mustard guidance as a potential disease.
Symptoms may include white raised pustules, leaf distortion, and yellowing.
Cool, moist conditions can favor disease development.
Reducing Disease Problems
To help prevent disease:
- Grow plants in well-draining soil.
- Avoid unnecessary overcrowding.
- Improve airflow between plants.
- Remove seriously diseased material.
- Rotate brassica crops where possible.
- Avoid moving contaminated soil and plant debris.
- Water according to soil conditions rather than keeping beds constantly wet.
Correct identification matters because several diseases can produce similar-looking symptoms.
Why Are My Mustard Greens Bitter?
Mustard greens naturally have a peppery flavor.
However, excessive bitterness or toughness can develop when plants experience unfavorable growing conditions.
Common contributing factors include:
- High temperatures.
- Drought stress.
- Overmaturity.
- Bolting.
- Irregular growth conditions.
Cool-season planting is one of the best ways to improve leaf quality. Maintain consistent moisture and harvest leaves while they are tender. Younger leaves often have a milder flavor than fully mature foliage. Some varieties are naturally more pungent than others, so experimenting with different cultivars can also help.
Why Are My Mustard Greens Bolting?
Bolting occurs when a mustard plant begins producing a flowering stalk.
It is part of the plant’s reproductive cycle. For gardeners growing mustard primarily for edible leaves, bolting usually marks a decline in harvest quality. Warm temperatures and plant maturity can encourage this transition.
Signs include:
- A rapidly elongating central stem.
- Developing flower buds.
- Smaller new leaves.
- Increasingly strong or bitter flavor.
Once a plant begins bolting, removing the flower stalk generally will not restore its earlier leafy growth habit.
The best prevention is planting during the cool season and harvesting regularly.
Companion Planting With Mustard Greens
Mustard greens can be grown alongside many other vegetables and herbs.
However, companion planting claims should be treated carefully. There is limited direct evidence from the five-source framework that specific companion plants consistently improve mustard-green yields or prevent pests. Some flowering plants can support beneficial insects in vegetable gardens.
Potential insectary plants include:
- Sweet alyssum.
- Cilantro allowed to flower.
- Dill allowed to flower.
- Calendula.
UF/IFAS discusses research involving sweet alyssum intercropping with other brassica crops to attract beneficial insects. That does not establish a guaranteed pest-control benefit specifically for mustard greens.
Plants to Avoid Growing After Mustard Greens
The more important relationship is crop rotation.
Avoid repeatedly planting mustard greens and other brassicas in the same bed when rotation is possible.
Related crops include:
- Cabbage.
- Broccoli.
- Cauliflower.
- Kale.
- Collards.
- Turnips.
- Radishes.
- Bok choy.
These crops can share pests and diseases. This doesn’t mean they cannot grow next to one another. It means planting the same crop family repeatedly in one location can increase certain disease and pest risks. Rotate with unrelated vegetable families where practical.
When Are Mustard Greens Ready to Harvest?
One of the biggest advantages of growing mustard greens is their relatively short growing season.
Many varieties can be harvested approximately 35–50 days after planting. However, harvest timing depends on variety, temperature, and growing conditions. Cooler weather may slow growth. Baby greens can often be harvested before plants reach their full maturity.
UC ANR guidance describes harvesting young tender leaves around 4–5 inches long. UF/IFAS Chinese mustard guidance also describes larger mature leaves suitable for market harvest.
The best harvest size depends on how you plan to use the greens. For salads, younger leaves are often preferable. For cooking, larger leaves may be more practical.
How to Harvest Mustard Greens
There are two primary harvesting methods.
Method 1: Harvest Individual Leaves
For repeated harvests, remove the larger outer leaves first.
Use clean scissors or garden shears to cut the leaves without damaging the central growing point.
Leave healthy younger leaves in place.
The plant can continue producing new foliage while growing conditions remain favorable.
This method is particularly useful for small gardens where you want a steady supply of fresh greens.
Method 2: Harvest the Entire Plant
If you want a larger harvest at once, cut the entire plant near the soil line.
Whole-plant harvesting is useful when:
- Plants are approaching maturity.
- You need a larger quantity for cooking.
- Warm weather is approaching.
- Plants are beginning to bolt.
- You need to clear the bed for another crop.
For the best quality, harvest before leaves become excessively tough or overmature.
Succession Planting for Continuous Harvests
Mustard greens are well suited to succession planting.
Instead of sowing one large bed at once, plant smaller sections at regular intervals. During favorable cool-season conditions, sowing every 10–14 days can help spread out your harvests.
For example, you might plant one short row in early November, another in mid-November, and a third near the end of the month. As the first planting approaches maturity, the later plantings will be developing.
This approach can provide a more consistent supply of fresh leaves. Stop or adjust succession planting when rising temperatures make additional crops unlikely to mature successfully.
Storing Fresh Mustard Greens
Mustard greens are best enjoyed soon after harvest.
Freshly harvested leaves can lose quality if left in warm conditions.
After harvesting:
- Remove damaged or yellowing leaves.
- Wash the greens when ready to prepare them, or wash and dry thoroughly before storage.
- Remove excess surface moisture.
- Place the greens in a suitable refrigerated produce container or bag.
- Keep refrigerated and use while fresh.
Avoid storing leaves while dripping wet. Excess moisture can encourage deterioration. If you harvest more greens than you can use immediately, consider blanching and freezing them using a tested food-preservation method.
Zone 9 Regional Growing Considerations
Although Zone 9 includes many favorable mustard-growing climates, conditions differ considerably across the country.
Florida
Mustard greens are an excellent cool-season crop in Florida.
UF/IFAS planting windows vary by region, with opportunities extending through much of fall and winter.
Humidity and periods of heavy rainfall can increase the importance of drainage, spacing, and disease monitoring.
Texas
Mustard greens are well suited to cool-season gardening in many Texas locations.
However, strong cold fronts and rapidly changing temperatures may affect young plants.
Texas A&M AgriLife guidance emphasizes proper planting, thinning, and fertilization.
Arizona
Arizona’s low-desert gardens can provide favorable cool-season growing conditions.
Irrigation is particularly important because dry conditions can stress young plants.
Some afternoon shade may become helpful as temperatures increase.
California
Many California Zone 9 locations support fall and spring mustard planting.
However, coastal, inland valley, and desert climates have different temperature and rainfall patterns.
UC ANR planting recommendations should be matched to the local region rather than applied uniformly statewide.
Frequently Asked Questions About Growing Mustard Greens in Zone 9
What month should I plant mustard greens in Zone 9?
Fall through winter is generally the most dependable period. Exact months vary by region. In Florida, UF/IFAS planting windows range from late summer through January or February depending on location.
Can mustard greens grow in winter?
Yes. Mustard greens are cool-season vegetables that often grow well during Zone 9 winters. Unusually hard freezes may damage foliage, especially on young plants.
How long do mustard greens take to grow?
Many varieties reach harvestable maturity in approximately 35–50 days. Baby leaves can be harvested earlier, while cold weather may delay growth.
Do mustard greens need full sun?
Mustard greens generally perform best in full sun. Some afternoon shade may help reduce heat stress during warmer conditions.
How deep should I plant mustard seeds?
Plant seeds approximately ¼–½ inch deep in a moist, well-prepared seedbed.
How far apart should mustard greens be planted?
For standard leaf production, space plants approximately 4–8 inches apart. Larger mature plants may require more room.
Can mustard greens grow in containers?
Yes. Mustard greens grow well in containers with adequate drainage, suitable potting mix, consistent moisture, and sufficient sunlight.
Will mustard greens grow back after cutting?
They can. Harvesting mature outer leaves while preserving the central growing point allows many plants to produce additional leaves.
Why are my mustard greens turning yellow?
Yellow leaves can result from several causes, including nutrient deficiencies, excess moisture, drought stress, aging foliage, or disease. Inspect the whole plant and growing conditions before applying fertilizer or treatments.
Can you grow mustard greens in the summer in Zone 9?
Summer is generally less favorable because high temperatures can increase bitterness, reduce leaf quality, and encourage bolting. Cool-season planting is more dependable.
Final Thoughts
Growing mustard greens in Zone 9 is a simple and productive way to take advantage of the cooler gardening season.
Unlike warm-season vegetables that require high temperatures, mustard greens perform best when the weather is mild. For most Zone 9 gardeners, fall through winter offers the most dependable growing conditions.
Start by choosing a suitable variety such as Florida Broadleaf, Southern Giant Curled, Green Wave, or Red Giant. Plant seeds approximately ¼–½ inch deep in fertile, well-draining soil, provide adequate sunlight, and maintain consistent moisture. Thin crowded seedlings, fertilize according to soil conditions, and monitor plants for common brassica pests.
Once the leaves reach a suitable size, harvest the outer foliage regularly to encourage continued production. One of the best things about mustard greens is how quickly you can enjoy the results.
With favorable weather, you may begin harvesting in just a few weeks, and successive plantings can keep fresh greens coming throughout the cool season. Whether you grow them in raised beds, containers, or a traditional vegetable garden, mustard greens deserve a place in your Zone 9 winter planting plans.
Related Zone 9 Gardening Guides
| Related Guide | What You’ll Learn |
|---|---|
| Zone 9 Winter Planting Guide | Vegetables and herbs to grow during the winter months |
| Zone 9 Fall Planting Guide | How to plan and establish a productive fall garden |
| How to Grow Turnips in Zone 9 | Planting, caring for, and harvesting another cool-season brassica |
| Zone 9 Crop Profiles | Growing requirements and planting information for Zone 9 crops |
Research and Extension Resources
This guide uses the verified Zone9Garden.com Mustard Greens Crop Research CSV and published information from university Extension services and USDA. Regional planting recommendations and growing ranges are preserved where the sources differ.
| Research Source | Reference |
|---|---|
| UF/IFAS | Chinese Mustard Production |
| Texas A&M AgriLife Extension | Mustard Greens Growing Guide |
| University of Arizona Cooperative Extension | Container Gardening in the Southwest Desert |
| UC Agriculture and Natural Resources | Mustard Greens Growing Information |
| USDA Agricultural Research Service | Mustard Cover Crop Fact Sheet |
Research note: The USDA resource covers mustard as a cover crop rather than specifically as a leafy vegetable. Companion-plant recommendations and some pest and disease descriptions are general brassica guidance, not mustard-specific experimental findings.